Archdale-Trinity Middle School
Lesson Plan
| |
Date: 01-30-2017
|
Teacher:
|
Witkowski
| |
Lesson/Unit Topic:
|
Keyboarding- Module 2- Alphabetic keys- Part 1
| |
Standards:
|
1.1 Implement proper keyboarding technique
1.2 Introduce Alphabetic keys
1.3 Begin timed writings on Alphabetic keys
1a & 4f team work on posture skit
|
“I Can…” Statement
|
Criteria for Success-Formative/Summative Assessments
|
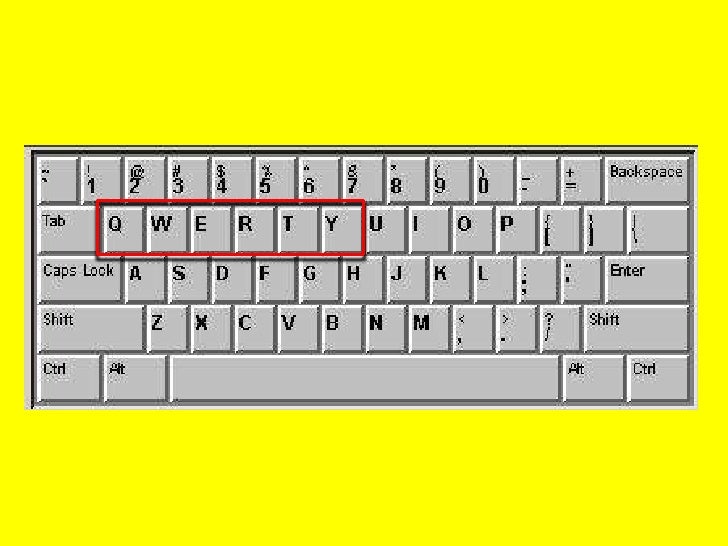
I can explain why the keyboard is called the QWERTY keyboard
|
Students use the new typing method.
|
Literacy/Vocabulary Strategies (Word Wall)
|
Qwerty keyboard, technique, alphabetic keys, touch method of typing, posture, pinky (little finger), ring finger, middle finger, index finger, thumb, wrist, the copy
QWERTY KEYBOARD:
 |
Bell-Ringer/Connecting Strategy
|
Bellringer:
A. Finish Why Study? and/or Ribbon activity
B. Write your name on your Typing worksheet.
|
Lesson-Instructional Strategies & Procedures for Teacher and Students
(Detailed Plans Including Best Practices, Researched Based Strategies)
|
Guided Practice
Miss W will review:
@Touch-method of typing technique
@ Correct finger placement for the home keys
@ Proper Keyboarding Posture and Technique
Independent Exercise:
1. Students will take a typing test at http://www.typingtest.com to get their beginning words per minute.
2. Students will learn the proper finger placement for touch typing by looking on page 52
and coloring the correct colors for each finger on the QWERTY keyboard.
3. Why is the keyboard called a QWERTY keyboard?
http://image.slidesharecdn.com/objective1-011-02-100205143106-phpapp02/95/objective-1-01-1-02-18-728.jpg?cb=1265380293
4. Students will participate in a team exercise-
Proper Typing Skit- students will act out the improper way to type
and then act out the proper way to type.
Make sure to include all of the Posture and Technique bullets and
the Work Area Arrangement bullets.
5. On the bottom of the first page write:
Home keys ASDF JKL; then draw a picture of a home
6. On the bottom of the second page write:
-Eyes should look at the copy (what you are copying) NOT the keyboard.
- When a person is keying copy the hands and arms should remain relatively stationary.
They should not move much.
7. Students will label the different types of fingers, index (blue), middle(red), ring(green) and pinky (yellow) and color them so they match the QWERTY keyboard finger positions.
8. Students will evaluate themselves and another student using the Posture and Technique Check List and will list 2 items they need to improve.
9. In teams students will answer the Posture and Technique Review questions on the last page.
|
Higher Order Thinking Questions
|
How can typing faster help you in college and on your job?
|
Student Technology/Differentiation
|
The typing unit is taught with all three learning styles. Fingers and keys are associated with colors and are demonstrated on huge visual keyboard (visual), students color keys and practice typing game (kinesthetic) and students are given (verbal) instructions.
|
Closure Strategy
|
Exit Activity:Students will practice touch typing the home row keys
with a game called HomeKeys Kennys.
Remember- Do NOT look at the keys while playing.
Try your best to click on the keys from memory.
|
No comments:
Post a Comment